Desertcart purchases this item on your behalf and handles shipping, customs, and support to India.
🔥 Elevate your breakfast game with Rome’s iconic cast iron waffle iron!
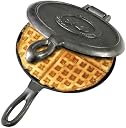
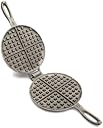
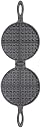
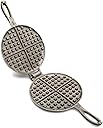
Rome's #1100 Old Fashioned Waffle Iron is a durable cast iron kitchen tool designed to create classic 6.75-inch round waffles. Trusted for over 30 years, it features a secure pie iron style hinge and is optimized for use on BBQ grills, camp stoves, and campfires. Portable and backed by a 10-year warranty, this waffle iron blends vintage charm with rugged outdoor versatility, perfect for millennial professionals who value quality, tradition, and adventure.
| ASIN | B000BWCTL0 |
| Best Sellers Rank | #287,917 in Kitchen & Dining ( See Top 100 in Kitchen & Dining ) #392 in Waffle Irons |
| Brand | ROME |
| Brand Name | ROME |
| Color | Black |
| Customer Reviews | 3.9 out of 5 stars 1,570 Reviews |
| Global Trade Identification Number | 00029794112683 |
| Included Components | 1100 |
| Item Dimensions D x W x H | 6.75"D x 10"W x 1"H |
| Item Type Name | Old Fashioned Waffle Iron - Cast Iron |
| Item Weight | 4 pounds |
| Manufacturer | ROME |
| Material | Ceramic |
| Other Special Features of the Product | Portable |
| Part Number | 1100 |
| Product Dimensions | 6.75"D x 10"W x 1"H |
| Product Style | traditional |
| Special Feature | Portable |
| UPC | 887668969579 703774954844 029794112683 707430984497 791769513756 |
| Unit Count | 1 Count |
| Warranty Description | 10 Year |
| Warranty Type | 10 Year |
| Wattage | 1000 watts |
G**Y
Was wary at first but so glad bought this waffle iron
I wasn't sure about getting rid of my electric belgium waffle maker but my husband hated it and wanted to give the cast iron a try. The electric waffle maker was so hard to clean because the batter would drip into all the little crevices in front and behind it and we couldn't find one that looked easier to clean. He was tired of eating belgium waffles and was missing the thinner crispier waffles. I was wary that this would be a good replacement. I shouldn't have been. I'm a new fan. I just gave our old waffle maker away after using our Rome Cast Iron Waffle maker for over about two months now. And we LOVE the kind of waffles it makes so we've made them almost every weekend. I know...a lot of dang waffles but they're sooo good. I read almost every review here on Amazon before I bought this and was concerned about the seasoning step and sticking waffles. I can tell you that those people did something wrong. Since the first day of using it, we have been getting non-stick waffles. SEASONING: Seasoning was no major pain. I just used a paper towel and wiped the whole thing (front, back, handles) with Crisco (not a heavy coating). We followed the directions that came with the waffle maker and stuck it in the oven at its suggested temperature and after a great deal of smoke, the waffle maker was seasoned. We did this late at night while the kids slept, removed all the smoke detectors and opened all the windows. No big deal. PROCESS: The next morning we used the waffle recipe and made really great waffles (don't forget to sift so you get nice fluffy waffles). Not one has stuck. I think people are not either using good oil to season their iron or they are not getting their irons hot enough when they pour the batter on. 1) Turn on both front and back burners. Front on med to med/high. Back on low (med at first to warm it up-then switch to low after first waffle is made). 2) Put iron with bar in front and one with lip on back and preheat for a few minutes while blending ingredients to batter. 3)Pour batter onto front burner iron (one with bar) and then take the other iron off back burner and hook onto front one. 4) Set timer to 1 min or 1min20sec depending on how dark you like it (you'll have to play with timing and heat the first few batches to get it just right) 5) Flip it and set timer to same amount time 6) I flip it once again so that bar is on bottom, unhook and place hook iron on back burner again while pour batter and repeat process Sounds like a lot but I just make a whole batch of waffles in no time and once you get into the groove it goes by rather quickly and you'll have a few to store in the freezer for later! TIPS * We've used several diff recipes and have used packaged mixes too (including the Trader Joe's waffle/pancake mix). My absolute favorite is the simple waffle recipe in the Joy of Cooking. So easy and we splurge with the butter. It recommends 2-7 TBS butter. We go for 6-7. Yup. Delish. * I don't wash it since it's non-stick and none of the waffle remains on it. I wipe it down with a light layer of Crisco if any area looks dry and then store between paper towels. This way it keeps getting nice and dark each time I use it. *I use those silicone pot holders--slim and easier to flip the small handles on the iron than my cloth pot holders. * I don't see how this would work well on electric stoves since you have to adjust the flame to get it just right. Just my simple opinion...take it with a grain of salt.
P**O
Perfect Waffles Every Time! Cooking/Seasoning instructions here!
I use this on a gas stove. This waffle maker makes perfect no-stick waffles every time. First I melted off the wax coating and seasoned the pan (see below for instructions). Get your wire cooling rack, a clean dishtowel and parchment paper and scissors. Cut about 12 squares of parchment paper to place one in between each cooked waffle (these can be reused for a couple batches and you can use them to place between your waffles for freezing in a container). The first time I cooked waffles on this iron, I didn't realize I wasn't supposed to spray the iron every time I put more batter in it. This worked out well for me because not one of my waffles stuck (although I did go through almost a whole can!). The second time I made waffles,I only sprayed the irons once at the beginning of the first waffle and they did not stick to the pan when not spraying each subsequent waffle. Here's my technique for cooking...heat each irons at same time on gas burners heated at medium heat. Using a potholder or folded dishtowel to hold the irons (because they get very hot) Spray the bottom iron's cooking surface (away from flame, of course) (with the bar), place it back on the burner and using a #20 scooper, almost fill it with batter (I use Alton Brown's recipe). Using the back of the scoop smooth it out until the batter is about an inch from the edges of the iron. Turn off the burner under the other iron--this is the one with the hook end (and spray that one with butter spray). Carefully place the hook into the bar and place iron on top of the iron filled with batter and align properly. After one minute has passed, use your towel and flip the irons over (still on medium heat). Cook another minute and check each side using a wooden skewer. You may need to flip it again to brown a little more. I like my waffles a light golden brown. Release the waffle from the iron using a wooden skewer and unhinge the top. Put waffle onto dish towel and start your next waffle, heating both irons again on medium heat. When the second waffle is cooked, place a square of parchment paper on the first waffle and stack it on top. Continue this process. If you like your waffles crispy, pop them into the toaster oven. My daughters now prefer the home-made waffles over storebought! The first thing I did was boil a kettle of water to pour over the waffle iron to melt off the wax coating placed on the iron to protect it in shipping. Be careful...use pot holders to lift it and turn it over --it will get very hot. Now it's time to season the waffle iron. Preheat oven to 350F. Separate both pieces of the waffle iron and coat each of the 4 sides with lard or Crisco shortening using a paper towel or pastry brush to get into all the little squares. Crisco is the preferred choice because it is very highly refined, although I have used lard. It will start to melt immediately because the waffle iron will still be hot/warm from melting off the wax coating. Use paper towels to smear the fat all over the pan, handle and everything. Keeping the two piece apart still, place the two pieces onto a cookie sheet lined with foil, square sides facing down. Using proper ventilation (because this can get a bit smokey), place the cookie sheet and waffle irons in the 350-degree oven for an hour. Do not open the oven during cooking or you will get a huge cloud of smoke in your kitchen. Turn the oven off, leave oven door closed still; let the pan cool down (I let mine cool down overnight), wipe off the excess oil, and put it away. The whole process of cooking waffles on cast iron can be quite therapeutic if you're not doing it in the morning rush to get breakfast on the table. I always do it in the afternoon or on the weekends when I have time. I hope you love making homemade waffles on your teflon-free waffle iron as much as I do! I think I'm going to order the one with the long handles for camping! It wasn't available when I ordered this one. Bon appetit!
M**D
A tragedy from beginning to end.
From the very first time we used this it was nothing but trouble, hassle, and wasted time. It's shipped with a wax and removing that was not simple. We took about 10 minutes trying to scrub it off with soap and water until we decided that trying to melt it in the oven would be better (both scrubbing and melting were recommended in the instructions, so we tried both). Even after melting the wax "off", there was still a noticeable waxy residue on the surface of the iron. Another 5 or 10 minutes of scrubbing to try to remove that residue and it was ready to be seasoned. Seasoning worked fine. Not hard to rub oil all over it and bake it at 350 for an hour. The next morning we went to work trying to make the waffles. Followed the recipe, heated the irons on the stove, used butter liberally on the iron before the first waffle, as per the instructions, poured in the batter and spread it out with a spoon. So far, so good. I checked on it a few minutes later and it seemed like one side was well done but the other was raw, so I flipped the iron. Waited another two minutes but the raw side never darkened up and the dark side (the one no longer sitting on the burner) got too dark. Removed that waffle with a little difficulty (it stuck in the grooves and some of it came out in chunks). We moved on to the next waffle and repeated the process. This was a disaster. Again, one side dark and the other side looked raw, and this one I had to use a fork to get the pieces of waffle separated from the iron. After about five minutes of that process, ended up with about twenty pieces of both over- and under-done waffle. After all that, the waffle that was mostly in one piece wasn't even very good. I'm sure we could probably play around with the recipe, but not with this waffle iron. Moving on to something a little less labor intensive that actually works.
G**L
Makes one 7" round waffle at a time.
I want a good electric waffle iron. Apparently that's not a thing anymore. The reviews for all the waffle irons have issues, either the surface is a PFOA coating, or it's ceramic and it flakes after a short time, or the plates are not removable so you can't wash them. Even the machines that are $100+ have these issues. Kickstarter creators, here's your chance to make a decent machine! I own a bunch of cast iron cookware so I know the drill. I prefer the pre-seasoned stuff from Lodge, but they don't make a waffle iron. This one is coated in a thick wax coating as other reviewers have noted. I tried the boiling method first to try and get the wax off, but of course that wax water ended up in my drain and I didn't need that in my pipes, and the wax didn't all come off. I finally just put the thing on my gas stove and burnt off the last of the wax. Oh the smoke! I should have lit the BBQ and just burnt it all off outside. But the wax was off. Next up, add oil for seasoning, I used avocado because it's a high heat oil, and I had some. Pour it on, swirl it around and pour off the excess, then heat to just to smoking, then dialed it down to no smoke and watched it for 15 minutes. Paper toweled off the bit left, and repeated. Next up, find a glutton free recipe, and I did, oatmeal based, 1 cup oat flour, 2 eggs, 3/4 cup milk, t vanilla, 2 T maple syrup, pinch salt, and pinch cinnamon, and mix. Makes 3 7" waffles. Heat the two pieces on two burners until nice and warm, not smoking hot! Sprayed on a very light coating of avocado oil. Careful, don't do this with the flame on. Poured the batter in the pan, and cooked it for 3 minutes total, not enough time, back on the burner for another 3 mins. Your mileage will vary depending on how high you turn up your stove. But for this recipe seems like 3 minutes a side does the trick. All the pancakes came out without sticking. And they are delicious. Cleanup was minimal, rinse, dry, put back on the stove for a quick heat to remove the last of the water. Con: Small, you'd take forever to cook for a family. Maybe own two of these for a 4 burner stove? You need to keep both sides hot as you peel out the cooked waffle, so I kept putting the "top" back on the stove. I have good silicone oven mitts so the short hot handle was not an issue. But being a stove top you can't have a larger pan and keep the heat even to the edges. The casting is not as smooth as it should be, but hey it still released the waffles without sticking. Pro: low cost, lasts forever with a minimum amount of care. Can take it camping.
K**H
This Thing Makes Beautiful Waffles
This is a perfectly fine waffle iron. Anyone experiencing rusting hasn't properly seasoned their iron, which is crucial for both protecting it and cooking with it. Also, many are confusing the protective wax with stuck on batter, but that's simply false. The wax does need to be removed, but without it and seasoning, the iron would be rusty. Many of the bad reviews are simply user error. Don't be put off by them. There's a learning curve to cast iron cookware, but it's a rewarding hobby. I'll leave my impression of this waffle iron and all the steps I used to get it ready and cooking with it. I had a used nonstick belgian waffle maker that lost its coating, so any attempt to make waffles would just stick. However, I wanted something I could keep forever without worrying about a nonstick coating failure. They're convenient, but they're expensive and such a waste. And vintage cast iron waffle makers are nice, but they're so expensive. There's very few brand new cast iron waffle makers you can buy now, but Rome is one of the few. The design takes up little room and isn't too heavy, bulky, or over-engineered. This allows it to remain an affordable option, that and being made in China probably helps cut down on costs too. I'd love a new American made piece, but there just aren't many options. However, I've been very pleased with this waffle iron overall. The iron arrived with a coating of wax, which was quite thick in some areas. Scrubbing it would've been a pain, so I put them in a 500° oven till it stopped smoking. There was a lot of smoke, so be warned. I had to run my air, a fan, air filter, and open the window to help clear it out. Eventually, I was left with bare iron. Next, it needed to be seasoned, as it wasn't seasoned from the factory like Lodge cast iron is. To season, I did this process 4 times. On the outside, I poured a small amount of canola oil and spread it in all the nooks and crannies with a paper towel. Then, I used a fresh paper towel to wipe it all off. This may seem counterintuitive, but you will be left with a very thin coating of oil on the outside. When it's heated enough, it will polymerize and become a layer of seasoning. If too much oil is left on it, it will become sticky and hard to scrub off. Thinner is better when it comes to seasoning. The inside would be so hard to do with paper towels, so I found that using a pastry brush with a very light amount of oil does the job. Use the pastry brush to spead it everywhere on the inside, leaving only a thin layer. Your do not want any oil pooling in the waffle part, so be conservative in how much is used. After there's a thin layer all over, place it in a 400° oven for an hour, then turn it off and let it cool in the oven. Repeat this process 3-4 times to build up a good base coating. After it is properly seasoned, you can begin cooking! My first attempt didn't go over so well. I cooked them for 3 minutes, per the included instructions, and used a boxed waffle mix. However, it wasn't completely cooked and stuck. However, after some trial and error, I found that 375°-400° is the sweet spot. Preheat each side on a burner to that temp range, then use a pastry brush to lightly oil the inside. Also, wear oven mitts or welders gloves, as the short handles get very hot. Then pour in your batter, and cook on the first side for 3 minutes. After that, flip it over and cook on the other side for another 3 minutes, or maybe longer if needed. After this, you should have perfect waffles that releases beautifully. I used a butter knife to get it to come out, but it was completely effortless and fell out once I got it started. The more you cook with it, the better your seasoning will be on the inside. To find the temp of the irons, I'd strongly recommend getting an infrared thermometer. You get instant feedback on the temperature, and I use it a lot when cooking with my other cast iron skillets. It's especially helpful with cooking eggs. Once you have this, you can find the right settings on your range to get in the cooking temp-zone. I found that 3 was the perfect setting for my burners, but yours may vary. After figuring everything out, it's really not too bad making waffles. They aren't super thick, but they are still good sized waffles, in my opinion. Also, my batter didn't call for an egg, but I added it to hopefully give it more structure when cooked. You also might not need to clean it after every use, but if there is some waffle stuck to it, some hot water and a stiff brush will do the trick. Also, don't be afraid to use soap; it will not destroy your seasoning. After it's washed, wipe it off and place it on a burner for a few minutes to let the rest of the water evaporate. Don't let it air dry, as sitting water can and will rust your iron. This may not be as fast and easy as some of the electric waffle makers, but it is rewarding getting those perfect, delicious waffles that you carefully and skillfully made. Plus, if well taken care of, this can be something that is passed down through the generations. This is also a great alternative if you want less chemical-non-stick cookware. Overall, I'm very happy with my new waffle iron and can't wait to start cooking with it some more, especially when I go camping! This fits in well with the rest of my cast iron cookware. I'd highly recommend this to anyone, whether you're new to cast iron or someone more experienced.
S**1
The worst part was that every time I thought it was ...
I'm not sure about you guys, but I'm fairly new to cast iron. This was my first time seasoning one, and after reading up on how to do it, and following the instructions that came with it, I thought it wouldn't be so hard. I was totally wrong!! I was NOT prepared for the fact that the waffle irons would start smoking as I baked them in the oven (or that the oil i sprayed it liberally with would start to burn!) I set off the fire alarm 3 TIMES while trying to fry waffles in these After the third time when I coated each side with a lot of oil, the oil itself spilled over the sides after I fit both pieces together to fry the waffles. The worst part was that every time I thought it was done (I kept increasing the wait time, the last time I did it I waited close to 5 minutes each side to make sure it's totally cooked through), every time I pulled up the top, the waffle came apart with it!!! I had to use a fork to get all the pieces out, and it was NOT fun sitting there, unsticking itty bitty pieces of waffles from every crevice!! And this is after oiling it 3 times!! I'm not sure what I'm doing wrong :( I'm so frustrated. I wanted to use cast iron because all the waffle makers out there are aluminum for the most part, and I really wanted to get more iron into my diet. But with all the aggravation this is causing me, I might've been better off just buying an aluminum and saving myself the stress of frantically waving a towel under a wailing smoke detector each time I use it, and then having to spend about an hour eating the waffle in tiny pieces because it was stuck to the iron OTL.
J**S
Cast Iron Waffle Irons, New fashioned sense
For over three years, I planned to buy my very own waffle maker. I finally own one, one of the Rome Old Fashioned Waffle Irons. I love fresh Belgian waffles and longed for the ability to have them any time I wanted. I looked at big name brands on electronic waffle makers; including those, that multi-tasked making not just waffles but panini, etc. I had one of those type bookmarked for over a year and thought it might be the one. I changed my mind when I saw a type of non-stick copper griddle that Nostalgia Electrics sells, the GD20C, that caused me to select a Rome Old Fashioned Waffle Iron knowing it was the best for me. I bought one of the Nostalgia non stick copper griddles with warming tray to use with it and get much more use out of it. My spouse and I can fit our Rome Waffle Iron’s small size on our griddle, also make vegetarian soy Morningstar bacon and eggs next to it, and still make ourselves waffles. With the Nostalgia Electrics griddle’s warming tray, we can place our finished waffle in to keep warm while we cook our other waffle on holidays and weekends. Since it is cast iron, we can also use it outdoors in our back yard on weekends when we sometimes make wood smoked vegetarian breakfasts on our rolling fire pit. We gather wood from our trees we have trimmed. This we stack up in a spot in our backyard that is stone so we do not hurt the plants. We stack it decorative, making it look like a giant beaver dam that is up on land. This wood dries and we continually have ethical wood at the ready to cook outdoors with when we feel like it. I even make my own charcoal. I visited some people in Malawi, Africa and while I was there they showed me they made their own charcoal. These people did all of their cooking outdoors. Before this, I had no idea I could make my own charcoal. If you have a yard and want to gather ethical wood for a vegetarian barbeque I advise instead of purchasing wood you take some ethical wood trimmings (do not cut down a tree, you may have to wait until your pile of sticks/twig trimmings is large enough.) I gathered and pruned mine in my yard for over a year before we even bought our firepit. That is how we continually have enough wood because I spent a few years batching those twigs up in my yard before I purchased my firepit. Instead of buying a log rack my spouse and I constructed what resembles a giant beaver dam on our own land and one that is not in water so it looks unique. When I look out my back window I sometimes almost expect to see a giant 14 foot tall beaver with a paddle tail and a twig in his mouth, our wood pile is that cute to me. Since we have so many smaller pieces of wood, this would not have been the most logical best choice for us. We use our Works Jawsaw to cut the larger pieces to size. This is a very safe chainsaw and I can even cut wood sitting down with it. We oil it with high grade vegetable oil since we cook with it. When I trim I believe in the use of vegetable oil as it lubricates the cut made on the tree giving it helpful emollients. I never use machine oil when pruning. If you are interested in making your own charcoal it is very easy. Just let the fire extinguish on its own safely, make sure a spark screen is over it. This must be done overnight since it takes a while. When it is cool sift it. Homemade charcoal is what remains after the sifting. I sift my ash and coals with my spark screen. I repurpose snack bags, for example, organic corn chip and Cheeto bags and taking a funnel I fill these with the sifted homemade charcoal. I heat seal the filled bags of charcoal with my Foodsaver vacuum sealer. This is fantastic charcoal, better than any I have ever bought, and smells amazing and works great. Any person with a yard and an ethical wood fire can do something similar. I use my fantastic waffle iron in my back yard also as a type of pie iron, besides making waffles. I make homemade funnel cake mix and I can put this and homemade pizzelles mix in it. It has both indoor and outdoor uses for me. I can use it as a panini press when I make my paninis, turning it upside down and searing my vegetarian panini. As a result of buying my Rome Waffle Iron I no longer want a panini press, nor electric waffle maker nor pizzelle maker. My Rome Waffle Iron does it all, it is that fantastic! I appreciate the cast iron nature of it immensely and this is why I multi task it so much I am certain. These are so decorative! When mine is not in use I place it in my dining room on top of one of my mini heaters that looks a bit like a woodstove with a fake fire look-note these have very plastic looking legs that are only formed on one side, one of the AKDY 16" Retro-Style Floor Freestanding Vintage Electric Stove Heater Fireplace AK-ND-18D2P (Vintage Red) that are available new on Amazon. I recommend these little fake woodstove heaters with reservation. Do not expect these little electric woodstoves to look just like a woodstove or fireplace, they do not. But if you are okay with that as I am then these are adorable. The knobs do need to be painted with clear coat nail polish so they do not discolor over time. My waffle iron sitting there on mine in my dining room looks a lot like an old fashioned bed warmer from the 1800s and I look at it each time I eat in my little dining room unless it has just made waffles and is on my griddle in my kitchen of course. To make my wood stove much more realistic to me most mornings I take my Adaptive Sound Technologies Sound+Sleep SE Special Edition Sleep Sound Machine, White Noise Machine from my bedroom, and hiding it next to my woodstove set it on the sound of a fireplace to make my mini stove seem to come alive with the crackle of very realistic fireplace sound effect. These Rome Waffle Irons are so well made they ship with a lovely small folio type tag that is tied with twine that has recipes inside and gives instructions on how to season these waffle irons. I saved mine, carefully unwinding the twine and tied it to the handle of one of my small cabinets filled with mason jars I keep my various mueslis in to make custom homemade cereals with. If you are reading this, from the old fashioned sound of it you might assume I look old. Let me assure you I do not. I am a 5 foot nine inches tall type, very young looking, 24 inch waist, married, attractive female with a Baywatch figure who is a multi award winning writer, director, producer and formerly also acted. I also play many instruments and compose music. I happen to like what I have coined a ‘new’ fashioned look, which is a bit of a compendium of old and new. Obviously, I think house and home are very important and I am also a vegetarian for ethical reasons. I think these Rome Waffle Irons are the best quality well made, cast iron, small waffle irons.-Julie Sands
A**I
This waffle iron was exactly what I wanted
Cast iron has a bit of a learning curve so it may not be for everyone, but this waffle iron was exactly what I wanted as a cast iron waffle maker. It took some work but I was able to get great waffles to turn out. Here is what I did: 0. Remove the paraffin wax, this can be done by heating them in the oven at 200 (place on a tray or with something underneath) and most will melt off, then when they cool a little, but still warm, scrub them with soap and water. After this make sure to heat them on the stove so the water evaporates. I would do this step as a prep to season them, so allocate a couple hours to get the first coat of seasoning intact. 1. Make sure you have a good 2-3 coats of seasoning. This takes prep time but it will be 100% worth it when you have those tasty waffles. I used Crisco and kept it in the oven at ~400 for about an hour, 2-3 times, cooling to room temp after each time. It may take a couple days. Make sure it has a really nice really dark patina on it, the darker the plates are the less likely your waffles are to stick. If you've never seasoned cast iron before, check out some Youtube videos to see how the process goes. 2. When you're ready to cook, use a basting brush to brush both plates with oil (you could also use Pam spray but I dislike the chemicals and prefer to use oil). This also helps maintain the seasoning on the plates so you shouldn't need to re-season them later on. 3. Get them ripping hot. Use medium-high heat, turn it down a notch or so if they start to smoke. I heated both plates separately on 2 burners. You want the waffle mix to come into contact with hot oil and sizzle right away. 4. I used Kodiak Cakes mix so I can vouch for that, but I plan to try other waffle recipes in the future. I made the mix as indicated on the package for waffles (including adding the oil. I've skipped adding the oil and without it the waffles will stick). About 3/4 cup fills one entire plate but you might try less - it seems like the more mix you use, the more likely they are to stick. Not stick so badly that the plates have to be scraped but there's a chance your waffle could separate from itself. So far I've had luck pouring the mix on the bottom plate while it's on the burner, attaching the top plate, waiting about 30 seconds and then flipping. I wait a couple more minutes until the steam dies down and then flip it back. When opening, it seems like a good idea to pry open very slowly and use a fork to help guide the waffle off the top plate. Lastly, while learning, there's a good chance you'll get a stuck waffle or two. This could be because you forgot the oil, and/or your plates weren't hot enough, and/or they weren't well-seasoned enough. To clean (as much fun as it is NOT), I used a fork and/or a plastic cast iron scraper to scrape off as much as I could. I also heated the plates to medium and used some water with a plastic scrub pad and/or a plastic brush (BE CAREFUL doing this because the water will steam - good for cleaning but BAD for your hands!!!). Water won't hurt the plates once they've been seasoned. After you get them cleaned off you can heat them again so the water will evaporate, then apply another coat of oil or Crisco to maintain the seasoning. I hope this helps anyone who needs it! It took some finagling but now I'm eating delicious waffles :)
P**R
Absolutely love it
I love the latest addition to my cast iron collection. I had given up on getting a cast iron waffle pan, because all I could find were non-stick and/or electric. I stay away from non-stick completely, so I had no way of making waffles. Despite the shipping and customs, I decided to splurge on this, because there were no other options. The pan is so cute and well designed. Since it’s not huge in size, it’s kind of lightweight (I mean as lightweight as cast iron can get). It comes covered in a wax coating. What I did was wash it first in soap and warm water. Then I heated it on stove, with the plates on two different burners (since they are not welded together at the hinge you can take them apart). Upon heating, you will see wax melting and glistening. Then take the hot plates and put in sink and splash tap water. This will remove all the wax. Then wash again with soap. How to season: Pan plates back on burners. Heat again. Once it dries completely, spread oil thinly (don’t use too much oil) on the whole pan, inside and out including handles. Then let it heat on medium for 10 minutes or so. It will start smoking and changing colour into dark brown. This is oil polymerising and this is what makes cast iron non-stick naturally and protects from rust. Then apply another layer of oil and let it smoke another 10 minutes. By now you will have turned the whole pan into a dark brown shade. Voila, you have now seasoned the pan successfully. Let the pan come to room temperature. Wipe thoroughly with paper/cloth towel and store. Make sure your kitchen is well ventilated while you season, because it is gonna fill up with smoke. When you clean after making waffles, do not scour or use too much soap so that the seasoning stays intact.
K**N
Love this as a healthier alternative
This makes smaller sized waffles. Takes abit of practise to get the perfect waffles - the timing depends on your stove and how big a flame you use. It came with a thick layer of seasoning, which i burnt off on a pit post bbq. Don’t do it indoors though, it will stink up the home. Love this as an healthier alternative to the non stick waffle machines.
A**R
disappointed with this product
no instructions provided..sealed cast iron as per my other cast iron cookware ...still waffles stick...can't recommend this product
E**.
Excelente producto
Cómo todo utensilio de cocina hecho de este material, hay que encontrarle la manera. Mi recomendación es separar ambas partes y calentar cada una en una hornilla diferente pero de manera simultánea. Verter la mezcla en una de las mitades, esperar unos 20-30 segundos y después colocar la otra mitad de la wafflera y cerrar Apagar el fuego y dejar ahí unos 3 minutos Así quedan unos waffles hermosos.
S**A
Gem of a waffle iron
Gem of a waffle maker!!! Highly recommend Makes wonderfully crispy waffles on the outside and soft on the inside, and fully non stick.
Trustpilot
5 days ago
1 month ago