Desertcart purchases this item on your behalf and handles shipping, customs, and support to India.
🔌 Power Up Your Projects with Precision!
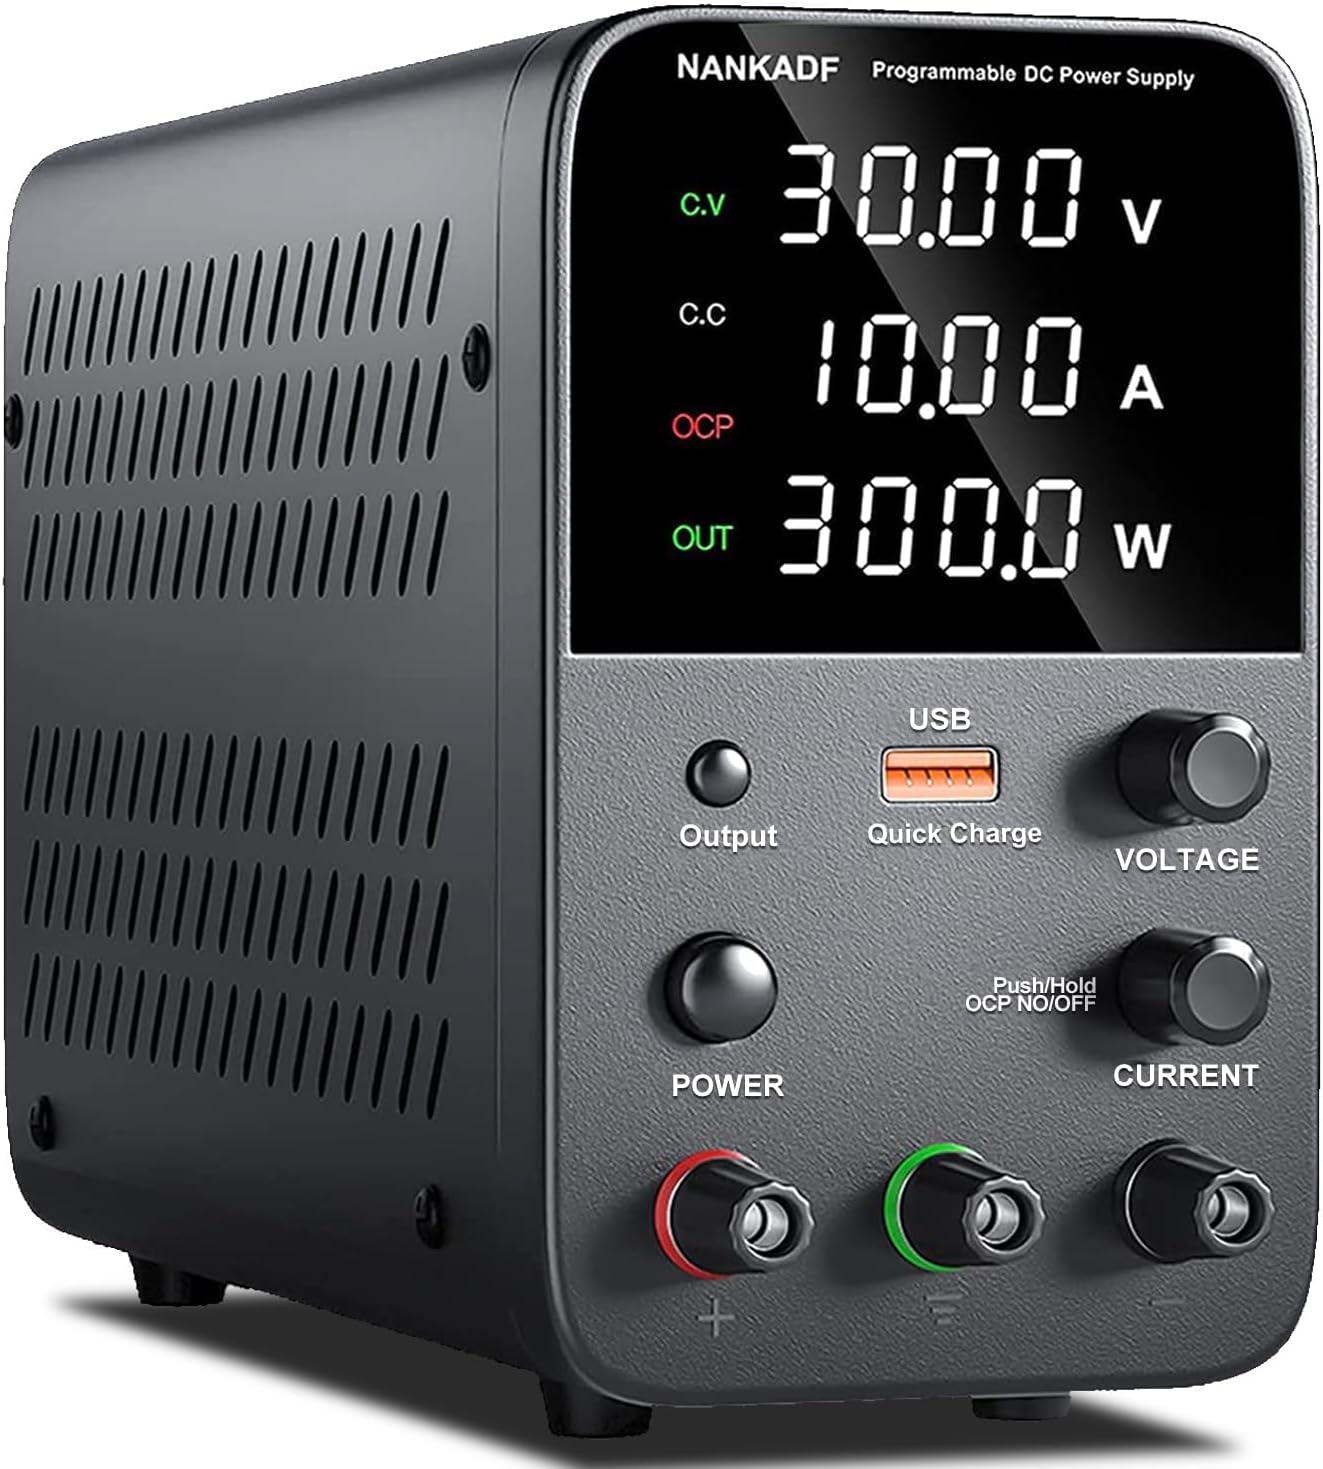
The DC Power Supply is a high-precision, adjustable lab bench supply featuring a compact design, 4-digit LED display, and a USB fast charging interface. With a maximum output of 30V and 10A, it offers advanced safety features and user-friendly controls, making it an essential tool for professionals and hobbyists alike.
| ASIN | B09C8LWV9W |
| Amperage | 10 Amps |
| Brand | NANKADF |
| Color | Black |
| Colour | Black |
| Connector Type Used on Cable | Usb |
| Connector type | Usb |
| Customer Reviews | 4.6 out of 5 stars 1,987 Reviews |
| Enclosure Material | PE_(Polyethylene), PLA_(Polylactic_Acid), PS_(Polystyrene) |
| Form Factor | benchtop |
| Input Voltage | 230 Volts (AC) |
| Input voltage | 230 Volts (AC) |
| Item Dimensions | 19 x 9 x 15 centimeters |
| Item Weight | 1.51 Kilograms |
| Item weight | 1.51 Kilograms |
| Manufacturer | NANKADF |
| Material | PE_(Polyethylene), PLA_(Polylactic_Acid), PS_(Polystyrene) |
| Maximum Power | 300 Watts |
| Mfr Part Number | WPS-10H |
| Model Number | WPS3010H |
| Output Current | 10 Amps |
| Output Voltage | 30 Volts |
| Output Wattage | 300 Watts |
| Specification Met | CE, RoHS |
| UPC | 780279579734 |
D**A
very good adjustability
The power supply has an excellent adjustability because it has a rotary encoder, combined with choice of setting which decimal you want to change, although i usually leave it at setting on the tenths. It's also very intuitive and looks nice.
J**O
Perfecta para mi.s requerimientos.
La fuente de Alimentación se nos entrega en una. caja muy bien envasada y con cables para poder ser usada.. Tras sacarla vemos que esta está fabricada en metal, y dispone de un venitilador para ayudar a disipar el calor que se pueda producir en el interior. Yo seleccione la de mayor capacidad de amperaje (30v-10Amp), ya que así dispongo de mas potencia en todo el rango de voltaje ya sí te aconsejo que hagas lo mismo, ya que la máxima potencia la entrega con la máxima tensión. Con ella puedes seleccionar el voltaje que deseas y limitar la corriente para evitar daños si no estás muy seguro del consumo del equipo que vas a probar o alimentar. Esta es una de las cosas más importantes de una fuente de alimentación de laboratorio, tanto "Pro" como esta de uso Amateur o de entrada. Otra de las cosas que me gusta es que muestre en el display a parte de la tensión y corriente, la potencia que se está entregando en todo momento, así te evitas el hacer cálculos, aunque eso es algo menos necesario, pero un plu, al menoss para mi. Como no, como buena fuente de alimentación de laboratorio dispone de protección frente a cortocircuitos, y he de decir que actúa inmediatamente, probado juntando positivo y negativo con intención para ver el tiempo de respuesta y es inmediato como he dicho. Amen de las salidas positivo, negativo y tierra para conectar las bananas, dispone de una salida USB-A para poder tomar corriente de ella y alimentar equipos que lo hagan desde este conector y así poder probarlos o si lo prefieres poner tu movil para cargarlo, eso ya es cuestión tuya. Dispone de un ventilador para evácualas el calor, pero en todo el tiempo que la he usado, bastantes horas, este no se me ha encendido en ninguna ocasión. Y si, funciona, porque lo probé usando la fuente a plena carga y tardo unos 5 minutos en saltar por la temperatura, pero con un uso normal, esta fuente con su disipador pasivo va mas que sobrada a la vez de silenciosa, obviamente. Estoy muy contento con ella y por lo tanto no me queda mas remedio que recomendárosla si o si tanto si eres Pro (usarla como secundaria) y principal si eres Amateur, o comienzas en el mundo de la electrónica y sobre todo una buena relación Calidad/Precio. 💯recomendada. Espero que esta reseña te haya sido útil 👍.
D**I
Bien
T'ip top bonne qualité
K**.
Sehr präzises Netzteil
Klasse Netzteil Über die sehr präzisen Einstellmöglichkeiten I und U wurde ja schon viel berichtet…..stimmt echt. Prima ist aber die recht geringe HF Schaltregler Störspannung , die liegt durchweg , über alle Ampere Einstellungen hinweg sehr gut……wenn man mit Oszilloskop drauf schaut 1 Ampere ca.10 millVolt eff. 2 Ampere ca. 15 millVolt eff. 4 Ampere ca. 50 milliVolt eff. Dazu gesellen sich vereinzelte höhere Spitzen ( 80 mVolt ) im Megahertz Bereich. Soweit , für ein Schaltregler Netzteil wirklich gut , und auch für Audio -Sachen gut brauchbar. Wer geringere Störwerte Werte haben will , klemmt halt noch einen 2200 uF /50 V mit Low-ESR parallel zum Ausgang . Oder einen Common Mode LC Filter , oder ähnliches LC Glied , hinter den Ausgang. ( Aufgrund der hohen Schaltregler Frequenz von ca 300 KHertz …. …hier reichen dann Werte im sehr kleinen 10 uHenry und kleinen 10-100 uf uF Bereich ( je nach niedrigem Kondensator ESR Wert ) . Somit wird das LC Glied sehr sehr niederohmig und trotzdem erreicht man eine hohe Dämpfung….mit nahezu kaum Verluste , bei DC , ( der liegt dann im DC — uVolt Bereich.). Beides ( einzeln betrachtet ) reduziert dann nochmals deutlich die Störwerte und Störspitzen. Wobei das LC oder , und LC Common Mode Glied die höherwertige Lösung ist. ( mit höherer Stör-Dämpfung ) . Danach ist dieses Netzteil für jede ! Audioanwendung bestens geeignet……da dann sehr sehr geringe Störwerte. —————- Prima ist auch die Umschalt Möglichkeit zwischen einfacher Strombegrenzung mit I -Anzeige und ( durch längeres Drücken auf den Stromeinstellknopf ) oder dann Spannungsabschaltung = Off , wenn der Stromwert erreicht ist. Also insgesamt ein sehr gutes Netzteil auch für den normal Elektroniker. ———- Einstellung der Helligkeit ….Menupunkt 3 (wahlweise hell =1 oder dunkler = 0 ) Einstellung kein Piepsen mehr ….Menupunkt 4 ( wahlweise aus = 0 oder ein = 1 ) ——— 1. Setup-Modus aktivieren: Drücken und halten Sie die Output-Ausgabetaste für etwa 3-5 Sekunden, bis das Gerät in den Setup-Modus wechselt. 2. Zum Modus 4 navigieren , dazu….. Drücken Sie den Volt-Drehknopf viermal, um in den Modus 4 zu gelangen. ( A-Zeile ) . 3. Piepsen ausschalten: Drehen Sie den Volt-Drehknopf im Modus 4, bis der Wert im W-Leistungsanzeigefenster auf Null steht. Dadurch wird das Piepsen beim Einstellen deaktiviert. 4. Einstellungen speichern: Wenn Sie die Einstellungen speichern möchten, drücken Sie den Volt-Drehknopf-Taste mehrfach , bis über Menupunkt 6 . Dann ist die Einstellung gespeichert und das Setup Menu wird verlassen.
A**N
Brilliant bit of kit
So glad I finally bought a bench supply. And checked on videos online to see which one is best at this price range. It does so much more than the cheapest ones. If you set the current limit, and it is reached it tells you it is in current limit mode and then the voltage drains down. You can also set it to shut off with Over Current Protection, where an alarm will sound and it will cut power. I found the leads more than adequate with the alligator clips and spade terminals, which I prefer to the banana clips. Readout is nice and clear with a fairly good update rate so you can see changes happen quickly. You can even adjust the baud rate in the options to make it quicker and lower the screen brightness. USB port also came in handy, although you cannot read the current draw for this, and the manual doesn't mention what it's limit is. I powered an Arduino and charged a phone off it, so it was fit for purpose. Adjusting everything is easy with pushing the knobs to change which digit you want to adjust to do fine or rough adjustment from 1 / 0.1 / 0.01 etc. It would be nice if it remembered which digit you were last on though, as it keeps defaulting to fine adjustment and takes a bit of remembering to push it first before turning it. Only thing is the beeps are a bit annoying, which wasn't a problem at first, because the manual lets you turn it off by going into settings if you hold down the output button for 5 seconds. However, it doesn't remember what you set each time you turn it off so have to do it all again every time. This is silly because it remembers all your other settings, even when you unplug. I might just open it up and cover the buzzer with a piece of tape to make it less noisy.
Trustpilot
1 week ago
2 months ago