We remain fully operational. Our teams are working around the clock to ensure your deliveries continue safely.

DOWNLOAD THE APP


Copyright © 2025 Desertcart Holdings Limited
DOWNLOAD THE APP


🚀 Build, Code, and Conquer the Future of Robotics!
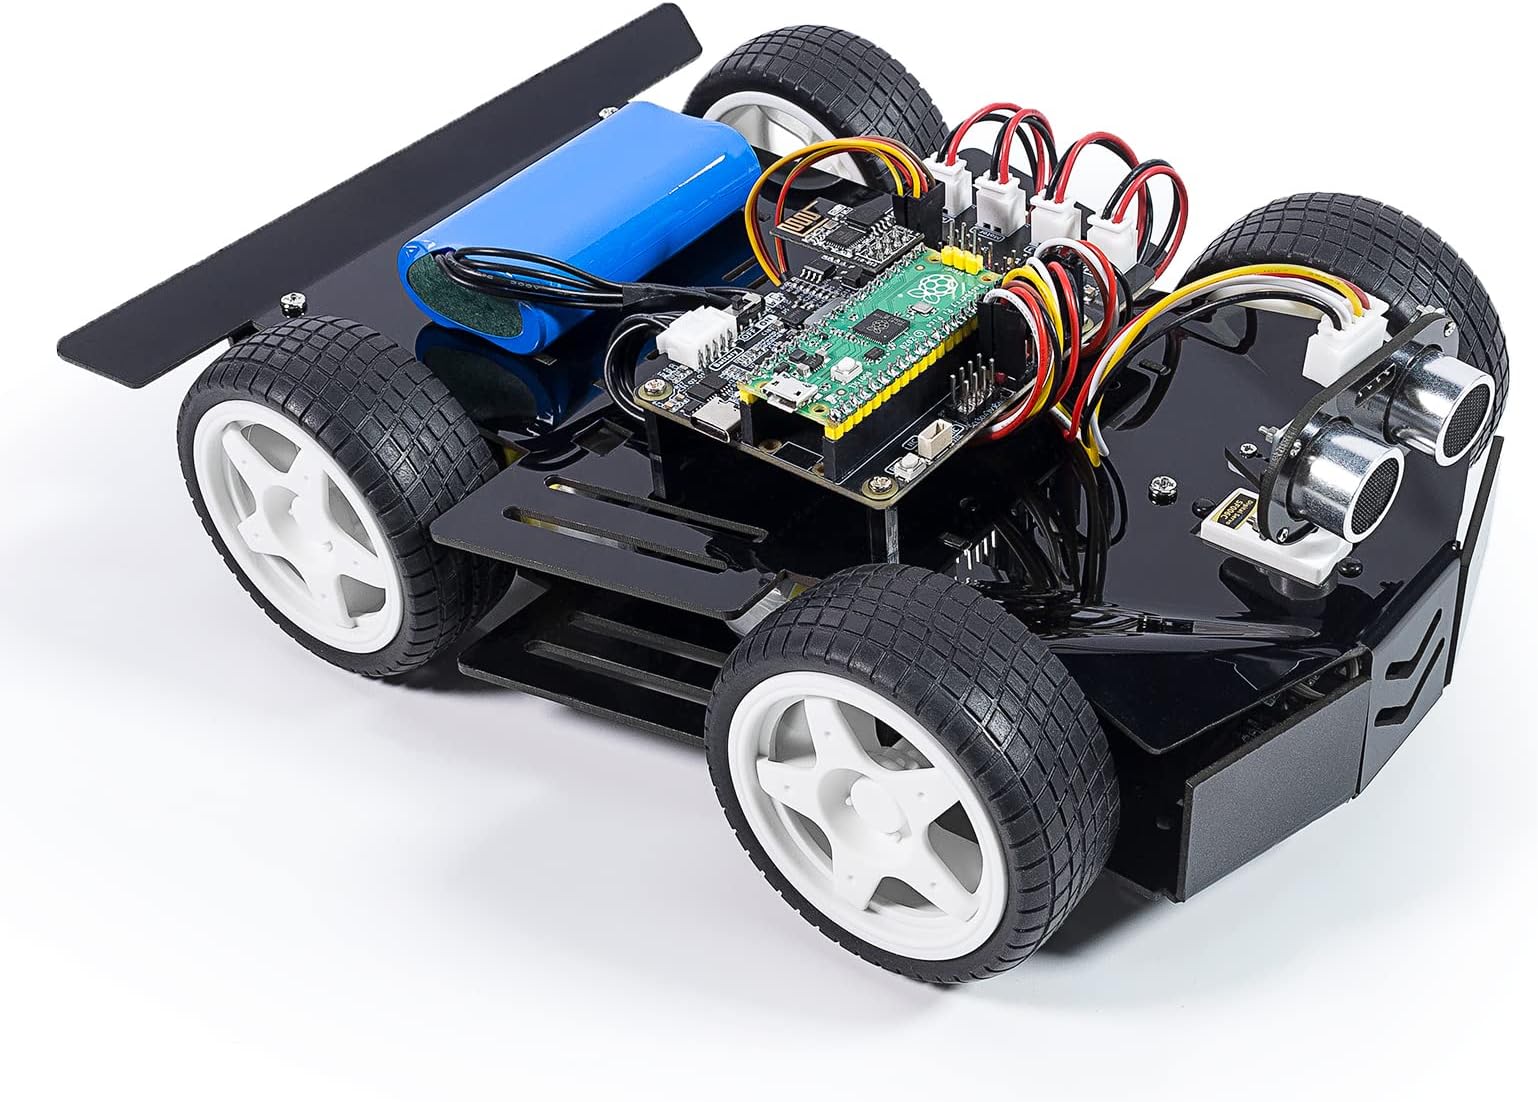
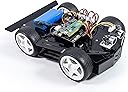
The SunFounder Robot Car Kit for Raspberry Pi Pico is an innovative DIY educational tool designed for aspiring programmers and hobbyists. It includes all necessary components, 10 comprehensive video courses, and an app for easy control, making it perfect for learning programming, sensory exploration, and problem-solving skills.


| Product Dimensions | 25.4 x 17.78 x 8.38 cm; 962 g |
| Batteries | 1 Lithium Ion batteries required. (included) |
| Manufacturer recommended age | 15 years and up |
| Item model number | CA Pico Car V2 |
| Educational Objective(s) | Programming skills, sensory exploration, problem solving skills, construction skills |
| Assembly Required | Yes |
| Batteries Required? | Yes |
| Batteries Included? | Yes |
| tech_spec_battery_description_toys | Lithium |
| ASIN | B0BZS5WF5M |
R**G
fun car
fun car. great project piece.
W**T
Tolles Bastelprojekt für Jugendliche (und Erwachsene) im Rundum-Sorglos-Paket
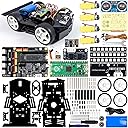
Das Auto-Kit ist meiner Meinung ein schönes Bastelprojekt für ein regnerisches Wochenende, oder auch mehrere. Die Anleitung ist sehr übersichtlich und gut bebildert und sollte für Erwachsene oder interessierte Jugendliche ab 12 Jahren geeignet sein.Das Paket enthält wirklich alles, was man für den Aufbau braucht, ordentlich verpackt in ESD-Tüten und mit Schaumstoff auf den Pfostenleisten, damit die nicht verbiegen. Das ist sehr gut.Neben dem Fahrzeugrahmen, Platinen, Schrauben, Motoren, Kabeln, Rädern und diversen Sensoren und LEDs liegen auch die passenden Schraubendreher, ein niedlicher kleiner Schraubenschlüssel, USB-Kabel und sogar eine Rolle Isolierband bei. Auch der Raspberry Pi Pico als "Steuercomputer" ist enthalten, so dass nichts mehr nachgekauft werden muss, was in Zeiten problematischer Lieferketten sehr willkommen ist. Hier hat man also nicht am falschen Ende gespart - immerhin kostet der Raspberry zur Zeit alleine ca. 6 Euro.Dank der guten Anleitung geht der Aufbau problemlos. Man sollte allerdings schon in der Lage sein, gründlich zu arbeiten, da z.B. für die Sensoren verschiedenfarbige Kabel richtig eingesteckt werden müssen. Wer schon von Ikea-Anleitungen überfordert ist, sollte also vielleicht besser bei Duplo oder Playmobil bleiben ;)Mit dem Raspberry Pi Pico als Steuerzentrale steht einem ein sehr großes Ökosystem für eigene Software-Ideen zur Verfügung. Vom Hersteller gibt es mehrere Beispiele, beispielsweise ein Programm, mit dem das Auto einer schwarzen Linie auf dem Boden folgt - ein typisches Projekt aus dem Informatikunterricht in der Oberstufe oder als Einstieg in die Programmierung im Informatikstudium. Die Beispiele sind in (Micro-)Python geschrieben, also einer aktuell populären und modernen Programmiersprache. Der Quellcode ist frei verfügbar auf Github und auf der Hersteller-Seite ist alles hervorragend dokumentiert, von der Installation der Entwicklungsumgebung bis zum Ablaufdiagramm. Ein wenig Englisch sollte man allerdings schon verstehen.Ich bin zwar kein Lehrer, könnte mir aber vorstellen, dass das Auto sehr gut für den Informatikunterricht in der Oberstufe oder Berufsschule zu nutzen ist und gut ein Halbjahr füllen kann. Mit dem Aufbau und dem Einrichten allein dürften die Schüler ein paar Stunden gut beschäftigt sein und dabei über Elektronik, Automatisierungstechnik (wie funktioniert z.B. ein Encoder) und Softwareentwicklung lernen. Wenn erst einmal alles läuft, ergeben sich aus dem Beispielcode gute Ideen für weitergehende Aufgaben. Beispielsweise braucht das Linienfolger-Programm eine durchgehende Linie ohne Knicke. Wie müsste man das Programm erweitern, um mit Unterbrechungen und Knicken klar zu kommen?Von mir gibt es volle fünf Sterne für das Auto und es hätte auch noch einen sechsten gegeben, wenn das möglich wäre. Von dem vollständigen Lieferumfang über den Spaß beim Aufbauen bis zu der guten Dokumentation und Open Source-Software passt hier wirklich alles.
A**R
Really like it
Programming this is in micropython, however I don't like that I have to keep plugging and unplugging the usb cable to deploy code changes- it would have been awesome if we could do it remotely like ssh or WiFi.Otherwise, it's been fun programming it, learning how to read the sensors, and I even took it to year 4/ year 5 class for coding lessons
た**7
ハードだけの評価(ソフトは自作)
目指すのは、予定した道順を通り帰ってくる車。移動距離は速度計でわかる、方角を知るためにジャイロを追加する。いくつかの道順からひとつを選び、緊急停止を指示するためにはESP01S Moduleは少し大げさすぎるので、TVのリモコンを乗せる。制御ソフトはArduinoIDEでゼロから作る。組立中に感じた事 ・4-pin Wireに2種類があることに気付かず間違えそうになったので、 2種類あることを明示して欲しかった。 ・モーター端子間に(ノイズ対策)コンデンサが有、 つなぎ目に力がかからないようになっていたのは好印象初めて触れる部品もあったけれど公開されていた回路図、同梱の組み立て図で動作確認用プログラムを作る事ができ、ESP01S Moduleを除き、リモコン受信器、ジャイロを加えた部品が正常に動く事が確認できた。これから、いろいろ試しながら目指すプログラムを作って行く。
B**N
Frustrating yet fun
I was super excited when I got the chance to review this kit. I've wanted to tinker with with Raspberry Pi Picos for a while and robotics in general and this seemed like a fantastic way to jump into both at the same time. It's a fun kit. It honestly is, but it can also be very frustrating so you need to know what you're going to get into.When you first open the box there are two smaller white boxes inside that are absolutely packed full with pieces, screws, and a few tools. It's a little overwhelming at first so you need to have a bit of time on your hands and a large clean work surface before you get started.There are two screw drivers you'll find right away, but you'll have to dig through the many small bags to find the tiny wrench amongst the servo motor parts. You'll want this before you get too far.First thing it has you do is mount three LED strips to the chasis of the car with single use plastic rivets. These are not forgiving. So you have to get the orientation right and get those wires secured before pushing the rivets in. There are two spare rivets for this step, but if you mess up more than one LED strip or connection you'll quickly run out of rivets. (Thankfully I did not but I did have to pry one loose and use up all of mine to fix it.) I'm not sure why these couldn't have been screwed on, it would've been more forgiving...There's two more sensors on the bottom of the car that are also attached with rivets (different size) and these are just as unforgiving but it's harder to mess up the sensors.It seems like at every stage you're asked to use different size screws, nuts, stand offs, or rivets. It honestly gets rather overwhelming the number of times you have to find another little baggy containing yet another size screw, nut, or rivet. I would really have appreciated it if this could've been more consistent.When it comes to wiring everything together you have a few extra wiring harnesses in the box. The pictures in the manual all show nice pretty wiring where everything is routed nicely. I personally found that this was harder to accomplish. I wound up with wires getting squeezed in between brackets as I sandwiched the car together and had to fish them out mid-process. At one point when I was almost done I lost a small screw through a hole into the middle of the car and it got stuck to the magnets on one of the motors. So there I had to go fishing a screw out of the middle of the jumble of wires and everything else.Finally got it all put together and turned it on only to realize that the remote control app from SunFounder couldn't connect to my car. When I plugged it into the computer it looked like the pico either was never properly flashed at the factory or somehow got reset as I was trying to get it working. So that again was a little frustrating.I also picked up the car while it was powered on and shocked my finger tips by briefly touching a sensor board on the bottom of the car. That power pack cranks out some juice.Once I got through the experience of putting it together and getting it operational it's been a lot of fun, the journey to this point was just a little less than stellar. So giving it four stars because the hardware kit is definitely a good value, but the process for me at least was slightly more frustrating than I would've liked.Oh, on a side note it looks like the standoffs on top may be the right arrangement for an RPI 3. I held it up and it looked like the screws would align, but you would need a different breakout board or some custom wiring to use that instead of the included pico and breakout board.
Trustpilot
3 weeks ago
3 weeks ago